
 WATERPROOFING
 CONCRETE
 EPOXY PAINT
 ANTI-CORROSION PAINT
 ANTI-STATIC EPOXY PAINT
 STRUCTURAL BONDING
 CHEMICAL ANCHORS
 CONCRETE REPAIR
 REFURBISHMENT
 CEMENT TILE ADHESIVE
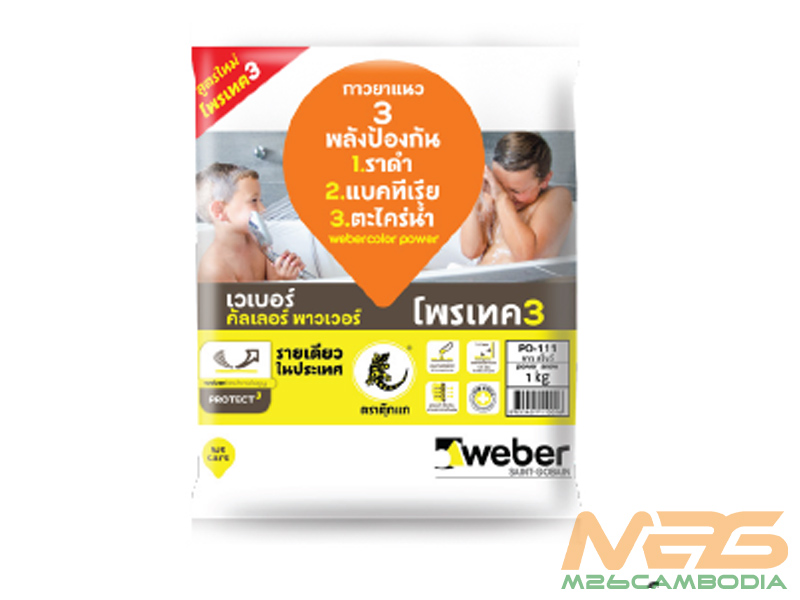
Webercolor Power
Elevate your tile project with Webercolor Power: Hygienic, vibrant, and easy-to-use cementitious joint grout in 40 colors. Transform your space today!
| BRAND | |
|---|---|
| PACKAGING | 1kg bags |
WEBERCOLOR POWER – TRANSFORM YOUR TILES WITH HYGIENIC GROUT
DESCRIPTION
Webercolor Power, armed with PROTECT3 technology, stands as the quintessential solution for safeguarding your living spaces from the insidious grasp of bacteria, fungi, and other unsightly microorganisms. This extraordinary cementitious joint grout comes fortified with ionic Silver-based additives, ensuring that your grout lines are not only immaculate but also hygienically sound. Whether it’s your bathroom, kitchen, or any shared area, Webercolor Power is the ultimate choice for achieving both aesthetic excellence and a sterile environment.
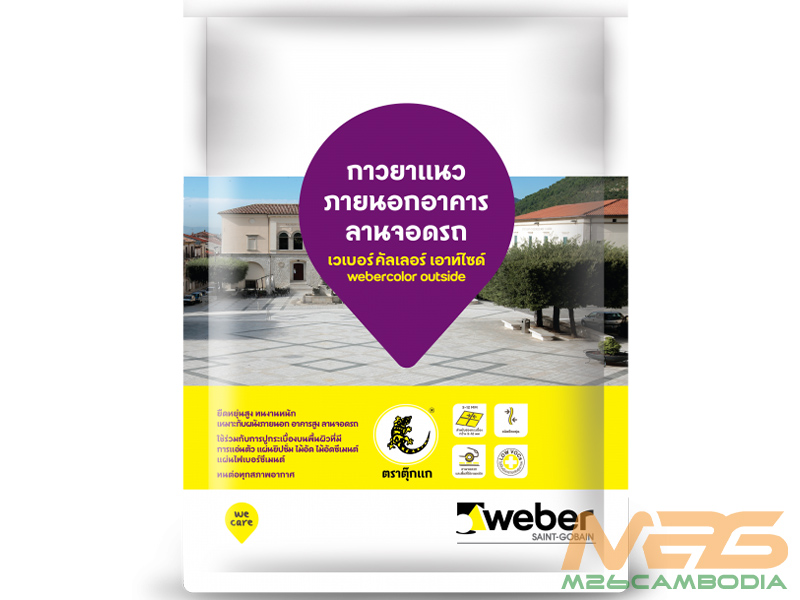
APPLICATION
Before diving into the application, the first step is to ensure your substrate is primed and ready for the transformation. Begin by meticulously cleaning the joints, ensuring they are free from any dirt or contaminants. This step is crucial to ensure optimal bonding and a uniform color finish.
Mixing
Webercolor Power’s application process is straightforward, thanks to its user-friendly nature. Here are the steps:
- Place clean water in a mixing bucket.
- Gradually add Webercolor Power into the water, maintaining a ratio of 1:2.5 by volume (1 part water and 2.5 parts grout).
- Stir the mixture until it forms a homogeneous, lump-free paste.
- Let the mixture sit for 3-4 minutes for chemical curing.
- The mixture is ready for application and should be used within 30 minutes after mixing when kept in the shade.
Grouting
Now that your mixture is ready, it’s time to apply Webercolor Power:
- Utilize a rubber trowel or grout trowel to diagonally fill the joints.
- Wipe off any excess grout with a damp sponge before it sets.
- Allow the grout to set for approximately 2 hours.
- Afterward, clean the tiles’ surface with a clean cloth to remove any residual grout.
- For the best results and optimum bonding, allow a full 24 hours before permitting traffic in the treated area.
ADVANTAGES
Webercolor Power offers a multitude of advantages for your construction or renovation project:
- Hygiene and Protection: The PROTECT3 technology with ionic Silver additives actively prevents the growth of bacteria, fungi, and microorganisms, ensuring your living spaces stay pristine.
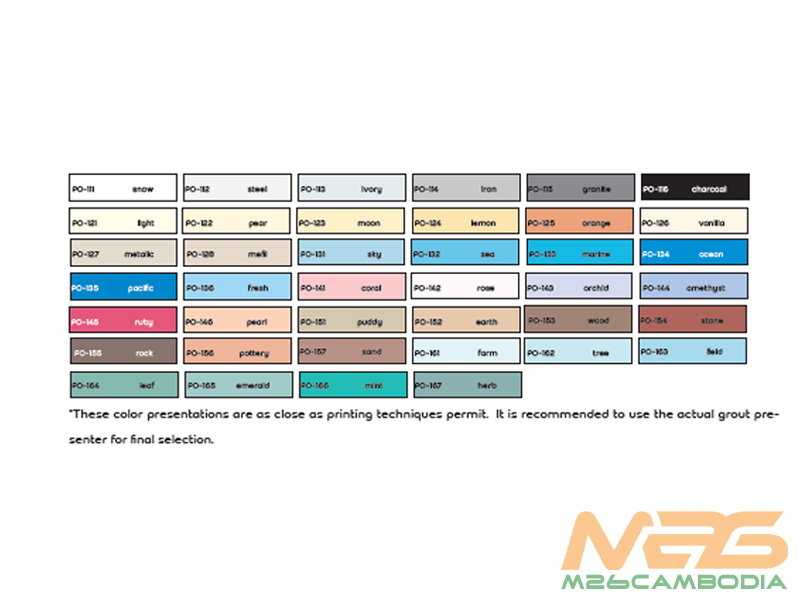
- Aesthetic Versatility: With a staggering 40 color options, you can effortlessly find the perfect shade to match your design aesthetic.
- Coverage: Webercolor Power boasts an impressive coverage of approximately 5 square meters per 1 kg bag, providing excellent value for your project.
PRODUCT INFORMATION
- Packaging: Available in convenient 1kg bags, making it easy to handle and mix.
- Color Options: Choose from a wide selection of 40 vibrant colors.
- Coverage: Each 1kg bag covers an average of 5 square meters.
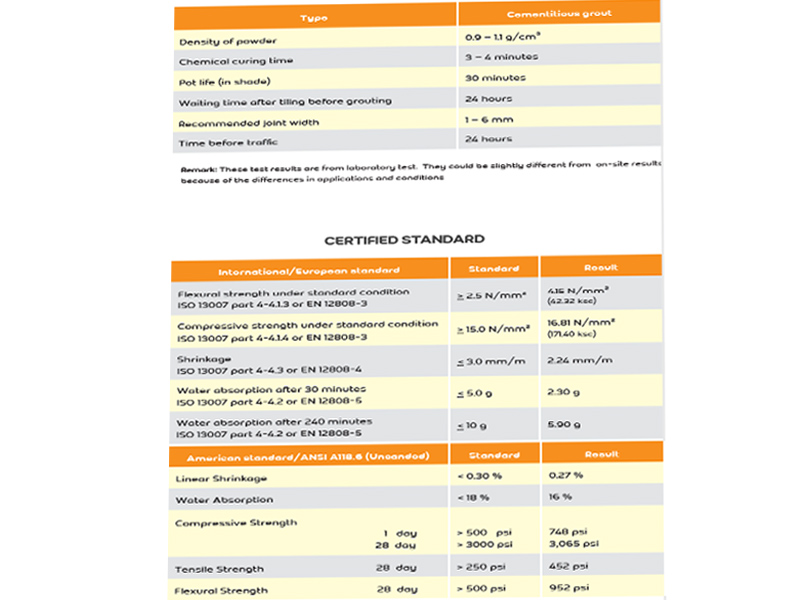
TECHNICAL SPECIFICATIONS
CONSTRUCTION INSTRUCTIONS
Step 1: Substrate Preparation
Before you start grouting with Webercolor Power, ensure that your substrate is adequately prepared. This step is essential for achieving a clean, uniform finish.
- Clean the Joints: Thoroughly clean the joints between your tiles, removing any dirt, dust, or debris. A clean surface ensures good bonding and color uniformity.
- Inspect the Substrate: Check the substrate (the surface where the tiles are installed) for any irregularities or imperfections. If you discover any issues, address them before proceeding with grouting.
Step 2: Mixing the Grout
Webercolor Power is easy to mix, ensuring a smooth and lump-free application. Follow these steps:
- Prepare a Mixing Bucket: Get a clean mixing bucket ready for the grout preparation.
- Add Clean Water: Pour clean water into the mixing bucket. The recommended water-to-grout ratio is 1 part water to 2.5 parts grout. Measure this ratio carefully.
- Gradual Grout Addition: Gradually add Webercolor Power to the water while stirring continuously. It’s essential to maintain the 1:2.5 water-to-grout ratio to ensure the mixture’s quality.
- Mix Thoroughly: Stir the mixture vigorously to achieve a homogeneous paste. Make sure there are no lumps in the mixture.
- Allow for Curing: After mixing, leave the grout mixture to rest for 3-4 minutes for chemical curing. This helps enhance the grout’s performance.
- Time Limit: Keep in mind that the mixed Webercolor Power should be used within 30 minutes after preparation. Avoid direct sunlight during this time, as it may affect the grout’s workability.

Step 3: Grouting
With the grout mixture ready, it’s time to start applying Webercolor Power to the tile joints.
- Tools: For grouting, use a rubber trowel or a grout trowel. These tools help you spread the grout evenly and efficiently.
- Application: Apply the mixed grout diagonally into the tile joints, ensuring full coverage. Press the grout firmly into the joints to avoid gaps or air pockets.
- Excess Removal: Wipe off any excess grout immediately with a damp sponge before it has a chance to set. This step helps prevent excess grout from drying on the tile surfaces.
- Setting Time: Allow the grout to set for approximately 2 hours. During this time, avoid touching or disturbing the grout.
Step 4: Final Touches
Once the grout has set, it’s time to complete the finishing touches for a polished look.
- Cleaning the Tiles: After the 2-hour setting period, clean the tile surfaces with a clean cloth or a suitable tile cleaning product to remove any remaining grout residue.
- Curing Time: For optimal bonding and durability, wait for a full 24 hours before allowing any traffic or placing heavy loads on the treated area.
By following these detailed construction instructions, you can successfully apply Webercolor Power cementitious joint grout to your tile project. Enjoy a clean, hygienic, and aesthetically pleasing finish in your residential or shared spaces.
Reviews
There are no reviews yet.