
 WATERPROOFING
 CONCRETE
 EPOXY PAINT
 ANTI-CORROSION PAINT
 ANTI-STATIC EPOXY PAINT
 STRUCTURAL BONDING
 CHEMICAL ANCHORS
 CONCRETE REPAIR
 REFURBISHMENT
 CEMENT TILE ADHESIVE
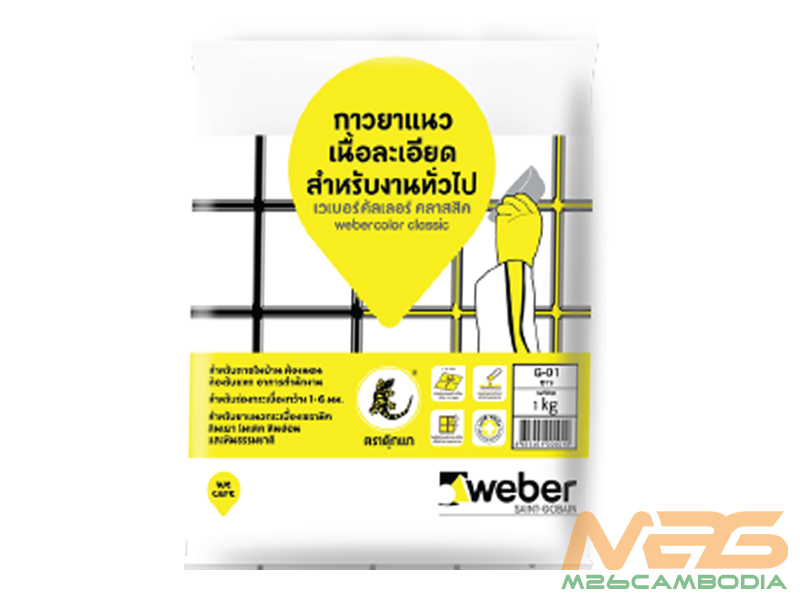
Webercolor Classic
Discover Webercolor Classic: The ultimate tile grout solution for stunning floors and walls. Explore 29 vibrant colors. Perfect for every project!
| BRAND | |
|---|---|
| PACKAGING | Bag 1kg |
Webercolor Classic – Your Trusted Tile Grout
Description:
In the ever-evolving world of construction, where precision and excellence reign supreme, Webercolor Classic emerges as the ultimate choice for your tile grouting needs. This versatile and dependable tile grout is tailor-made for both floors and walls in general areas. With a vivid palette of 29 colors to choose from, Webercolor Classic seamlessly integrates into any construction project, transforming it into a masterpiece. In this article, we delve deep into the application, advantages, and technical specifications of Webercolor Classic, ensuring you’re well-equipped for your next endeavor.

Application:
Before embarking on your grouting journey, ensure the substrate is immaculate. Clean the joints meticulously, removing all traces of dirt, guaranteeing impeccable bonding and uniform color distribution.
Advantages:
Webercolor Classic offers a multitude of advantages that make it a construction superstar. From ease of application to its vibrant color range, this grout is designed to impress:
- Wide Color Spectrum: With a stunning palette of 29 colors, Webercolor Classic allows you to bring your creative vision to life, enhancing the aesthetics of your project.
- Effortless Mixing: The straightforward mixing process ensures you get the perfect grout consistency every time.
- Rapid Curing: Thanks to its quick curing time, Webercolor Classic boosts your efficiency and minimizes downtime.
- Long Shelf Life: With a generous 18-month shelf life, you can stock up and be ready for any project that comes your way.

Product Information:
- Packaging: 1 kg bag
- Color Options: 29 colors
- Coverage: Average 5 m² per 1 kg bag
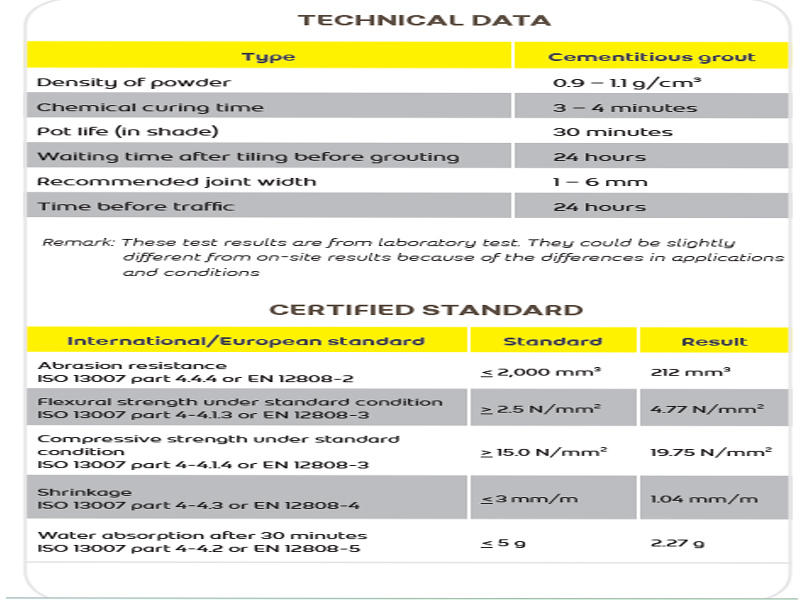
Technical Specifications:
Construction Instructions:
Step 1: Substrate Preparation
- Begin by thoroughly cleaning the joints where you intend to apply the grout. Remove any dust, dirt, or debris to ensure a clean, bond-ready surface. Use a stiff brush or a joint tool to clear the joints effectively.
Step 2: Mixing
- Gather the necessary materials, including Webercolor Classic tile grout, a clean mixing bucket, and clean water.
- Pour clean water into the mixing bucket. The recommended water-to-grout ratio is 1:2.5, which means one part of water to 2.5 parts of Webercolor Classic grout. For precision, you can use measuring cups or containers.
- Gradually add the Webercolor Classic grout into the water. Stir the mixture using a trowel or a mixing paddle. Continue to mix until you achieve a homogeneous and lump-free paste. This mixing process typically takes a few minutes.
- After mixing, allow the grout mixture to rest for 3 to 4 minutes. This resting period is crucial for the chemical curing of the grout.
- The mixture is now ready for application and should be used within 30 minutes after mixing. Be sure to keep the mixed grout in the shade during this time to prevent it from drying out prematurely.

Step 3: Grouting
- With the grout mixture prepared, it’s time to apply it to the joints between the tiles.
- Use a rubber trowel or a grout trowel to apply the grout. Begin by pressing the grout mixture into the joints at a 45-degree angle, ensuring it fully fills the gaps. Work in small sections to maintain control over the process.
- As you go, use a damp sponge to wipe off any excess grout from the tile surfaces. This step is crucial for achieving a clean and polished finish.
- Allow the grout to set for a period of 2 hours. During this time, avoid any contact with the grouted area to ensure the best bonding and curing results.
- After the 2-hour setting period, gently clean the tile surface with a clean cloth. This final touch will give your tiles a polished, grout-free appearance.
Step 4: Final Curing
- To achieve the best and most durable results, wait for a full 24 hours before allowing any foot traffic or other use of the grouted area. This extended curing time ensures that the grout has reached its maximum strength and durability.
By following these detailed construction instructions, you can confidently use Webercolor Classic tile grout for your construction projects. Whether you’re grouting floors or walls in general areas, this method will help you achieve professional and long-lasting results, ensuring the beauty and integrity of your tiled surfaces.

Reviews
There are no reviews yet.